개요
- local 환경에서 DETR 로 검출 된 object 의 bbox 를 SAM 에 prompt 입력으로 넣어 Instance Segmentation 을 수행하는 방법을 구현한다.
사용 모델
- Segment Anything
[논문리뷰] Segment Anything
Segment Anything (SAM) 논문 요약논문에서는 Segment Anything (SA) 프로젝트를 소개하며, 이미지 분할을 위한 새로운 모델, 데이터셋, 및 태스크를 제안한다. 이를 통해 프롬프트 기반 분할(promptable segmenta
gugalove.tistory.com
Segment Anything
Meta AI Computer Vision Research
segment-anything.com
- DETR
End-to-End Object Detection with Transformers | Notion
End-to-End Object Detection with Transformers
gugaluv.notion.site
GitHub - facebookresearch/detr: End-to-End Object Detection with Transformers
End-to-End Object Detection with Transformers. Contribute to facebookresearch/detr development by creating an account on GitHub.
github.com
개발 환경
- OS : macOS(Apple Silicon M4)
conda 가상 환경 설치
- MPS (Metal Performance Shaders) 사용을 위한 conda 가상환경 만들기 참조
- MPS : Apple의 Metal 프레임워크에서 제공하는 GPU 가속 라이브러리
MPS (Metal Performance Shaders) 사용 conda 가상환경 만들기
https://developer.apple.com/metal/pytorch/ Accelerated PyTorch training on Mac - Metal - Apple DeveloperPyTorch uses the new Metal Performance Shaders (MPS) backend for GPU training acceleration.developer.apple.com📌 1. Conda 가상환경 생성먼저,
gugalove.tistory.com
Apple M4 pro vs M1 학습 속도 비교(GPU, CPU)
개요Apple M4 Pro 칩(14코어 CPU, 20코어 GPU, 16코어 Neural Engine) 을 장착한 Macbook Pro 14 에서 tensorflow 로 구현한 ResNet 과 VGG16 의 CPU 와 GPU 의 학습 속도를 비교해 보고 M1 MacMini 와의 차이는 어느 정도인지
gugalove.tistory.com
- 가상환경 name : sam
❯ conda activate sam

❯ pip install torch torchvision torchaudio
- DETR 모델 사용을 위한 mmdetection을 설치
GitHub - open-mmlab/mmdetection: OpenMMLab Detection Toolbox and Benchmark
OpenMMLab Detection Toolbox and Benchmark. Contribute to open-mmlab/mmdetection development by creating an account on GitHub.
github.com
https://mmdetection.readthedocs.io/en/v2.16.0/_modules/mmdet/models/detectors/detr.html
pip install -U openmim
mim install mmengine
mim install "mmcv==2.1.0"
mim install "mmdet==3.3.0"
- Segment Anything 설치
https://github.com/facebookresearch/segment-anything
GitHub - facebookresearch/segment-anything: The repository provides code for running inference with the SegmentAnything Model (S
The repository provides code for running inference with the SegmentAnything Model (SAM), links for downloading the trained model checkpoints, and example notebooks that show how to use the model. -...
github.com
❯ pip install git+https://github.com/facebookresearch/segment-anything.git
- 그 외 필수 패키지 설치
❯ pip install opencv-python pycocotools matplotlib onnxruntime onnx
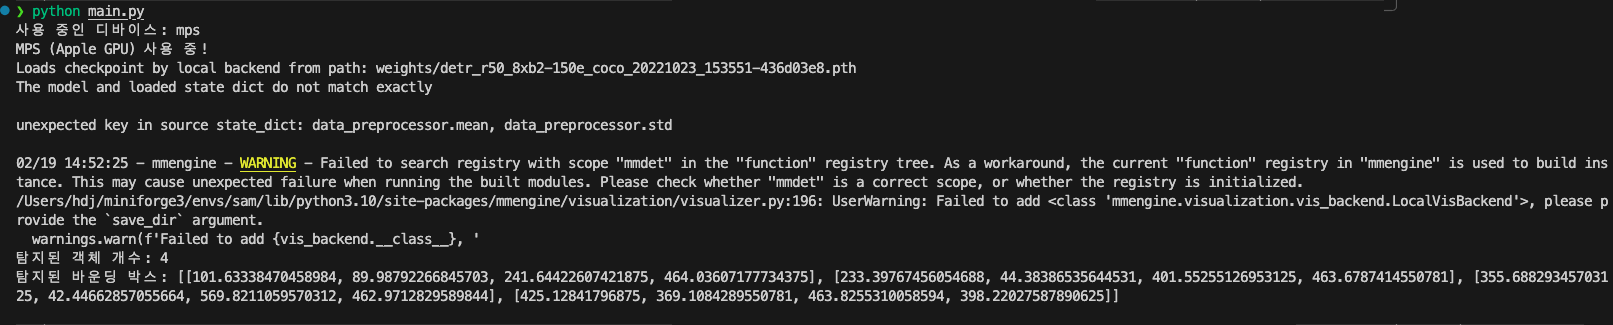
DETR 모델 구현
import torch
from mmdet.apis import DetInferencer

# 🔍 코드 설명: PyTorch torch.load() 패치하기
# 이 코드는 PyTorch 2.6에서 torch.load()의 기본 weights_only=True 설정으로 인해 발생하는 오류를 해결하기 위한
# PyTorch 2.6에서는 weights_only의 기본값이 True로 바뀌어서 모델을 로드할 때 추가적인 메타데이터가 필요한 경우 오류가 발생할 수 있음
# 이를 해결하기 위해 torch.load()를 패치(Patch) 하는 과정

# 원래의 torch.load 함수를 저장
original_torch_load = torch.load

# 안전하게 weights_only=False를 설정하는 함수
def patched_torch_load(*args, **kwargs):
    kwargs["weights_only"] = False  # weights_only 옵션을 강제 False로 설정
    return original_torch_load(*args, **kwargs)  # 원래의 torch.load() 호출

# torch.load를 패치
torch.load = patched_torch_load

def initialize(cfg_path, ckpt_path, device):
    return DetInferencer(
        model=cfg_path,
        weights=ckpt_path,
        device=device,
        show_progress=False)

def inference(input_path, model):
    results = model(
        inputs=input_path,
        out_dir=None,
        no_save_vis=True,
        pred_score_thr=0.75)

    predictions = results['predictions'][0]
    valid_indices = [i for i, score in enumerate(predictions['scores']) if score >= 0.75]
    valid_bboxes = [predictions['bboxes'][i] for i in valid_indices]

return valid_bboxes- 모델 config 코드와 모델 weight 파일이 필요
https://github.com/open-mmlab/mmdetection - DETR 에 대한 config 코드 : mmdetection/configs/detr
https://github.com/open-mmlab/mmdetection/tree/main/configs/detr - detr_r50_8xb2-150e_coco.py config 사용
- 해당 config는 아래 코드 필요
- mmdetection/configs/base/default_runtime.py
- mmdetection/configs/base/datasets/coco_detection.py
- 해당 config는 아래 코드 필요
- 모델 weight 다운로드
https://download.openmmlab.com/mmdetection/v3.0/detr/detr_r50_8xb2-150e_coco/detr_r50_8xb2-150e_coco_20221023_153551-436d03e8.pth
SAM 모델 구현
import cv2
import numpy as np

from segment_anything import SamPredictor, sam_model_registry


def initialize(model_type, ckpt_path):
    model = sam_model_registry[model_type](checkpoint=ckpt_path)
    predictor = SamPredictor(model)

    return predictor

def inference(input_path, prompt_bbox, predictor):
    input_img = cv2.imread(input_path)
    predictor.set_image(input_img)

    bbox = np.array(prompt_bbox)

    masks, scores, _ = predictor.predict(box=bbox, multimask_output=False)

    result_mask = masks[np.argmax(scores)]

    return result_mask

def visualize(input_img, input_mask, mask_color):
    overlay_mask = input_img.copy()
    overlay_mask[input_mask] = mask_color

    alpha = 0.5
    overlay_mask = cv2.addWeighted(input_img, 1 - alpha, overlay_mask, alpha, 0)

return overlay_mask- SAM의 pretrained model weight 다운로드
https://dl.fbaipublicfiles.com/segment_anything/sam_vit_b_01ec64.pth
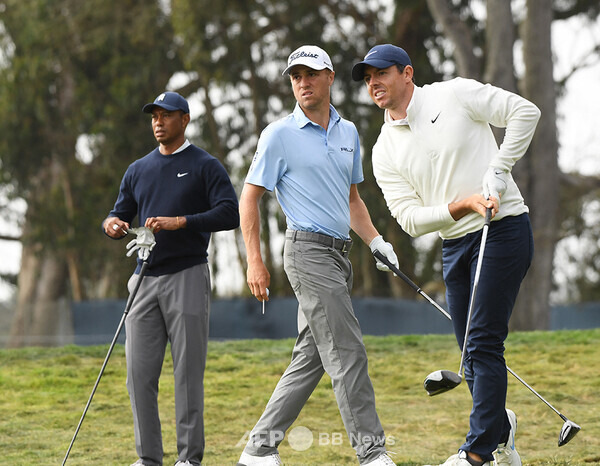
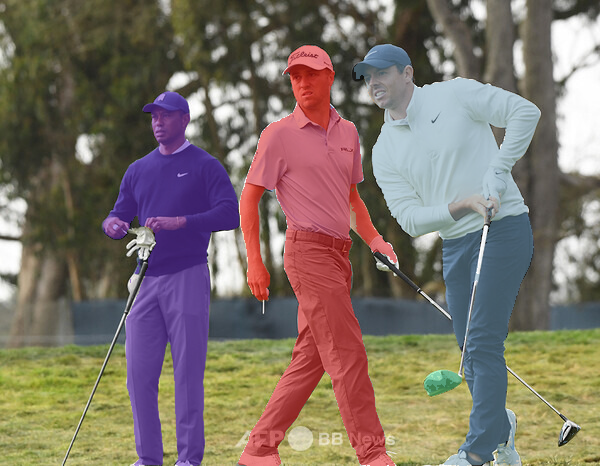
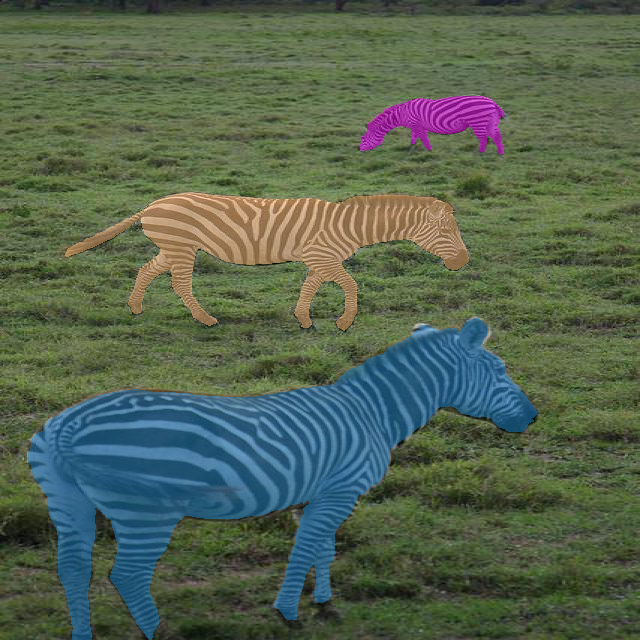
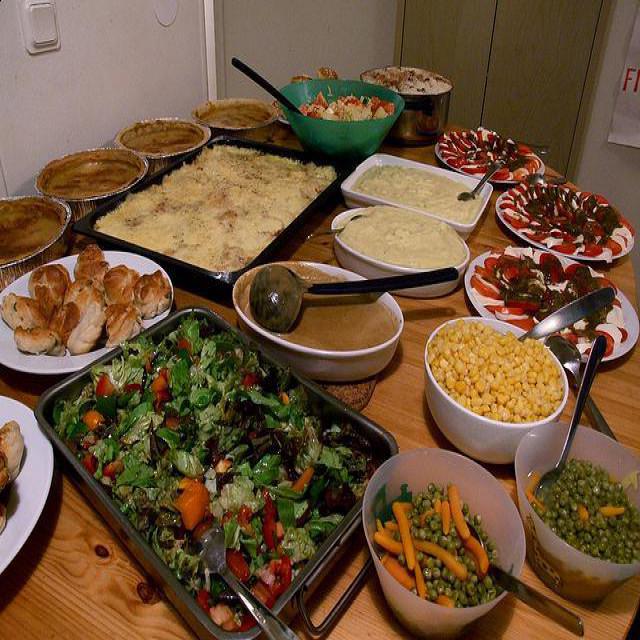
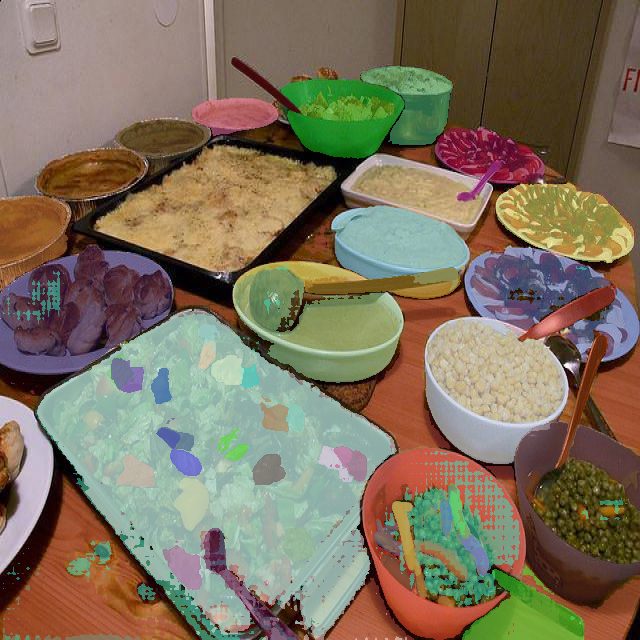
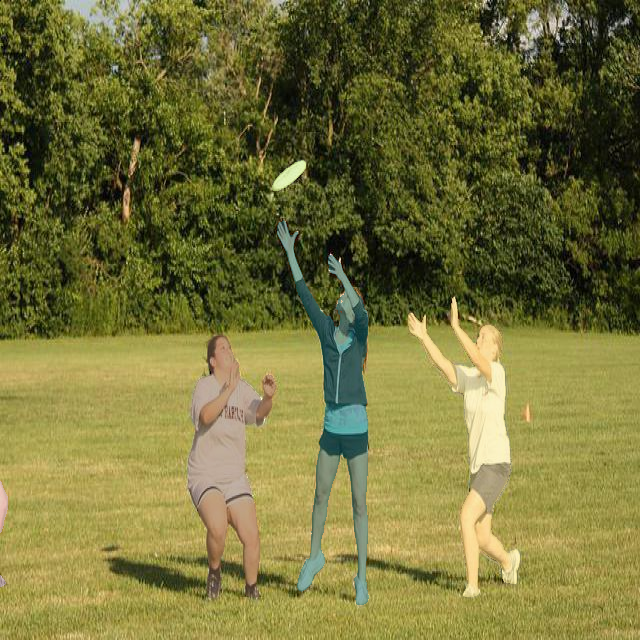
main 코드 실행 후 결과 확인
- segmentagion 결과 이미지 비교(좌 : 원본, 우 : Segmentation)


추후 학습 방향
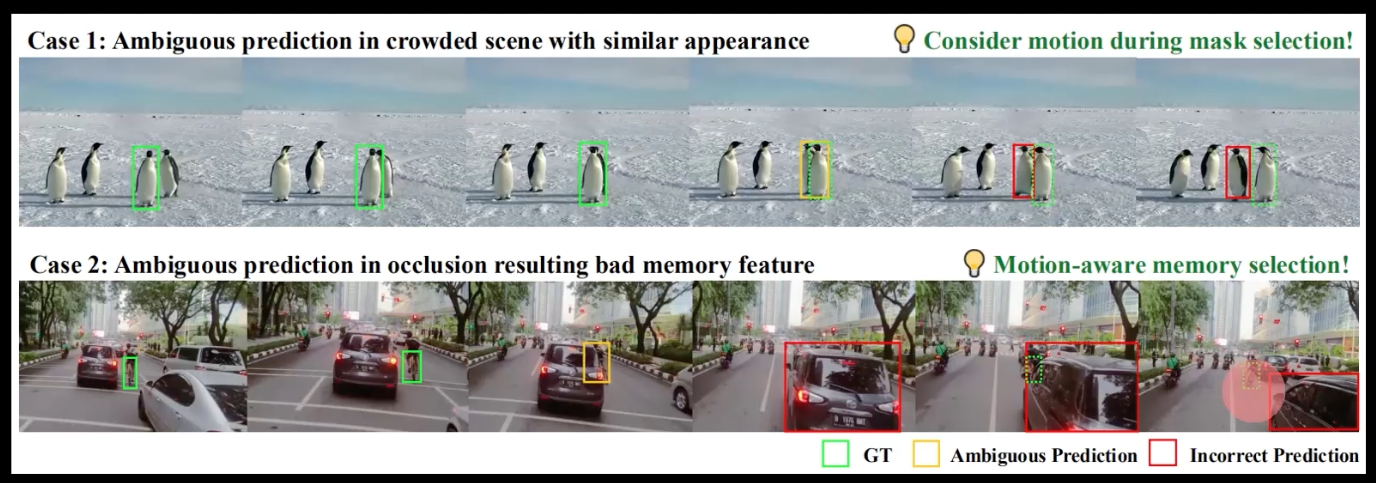
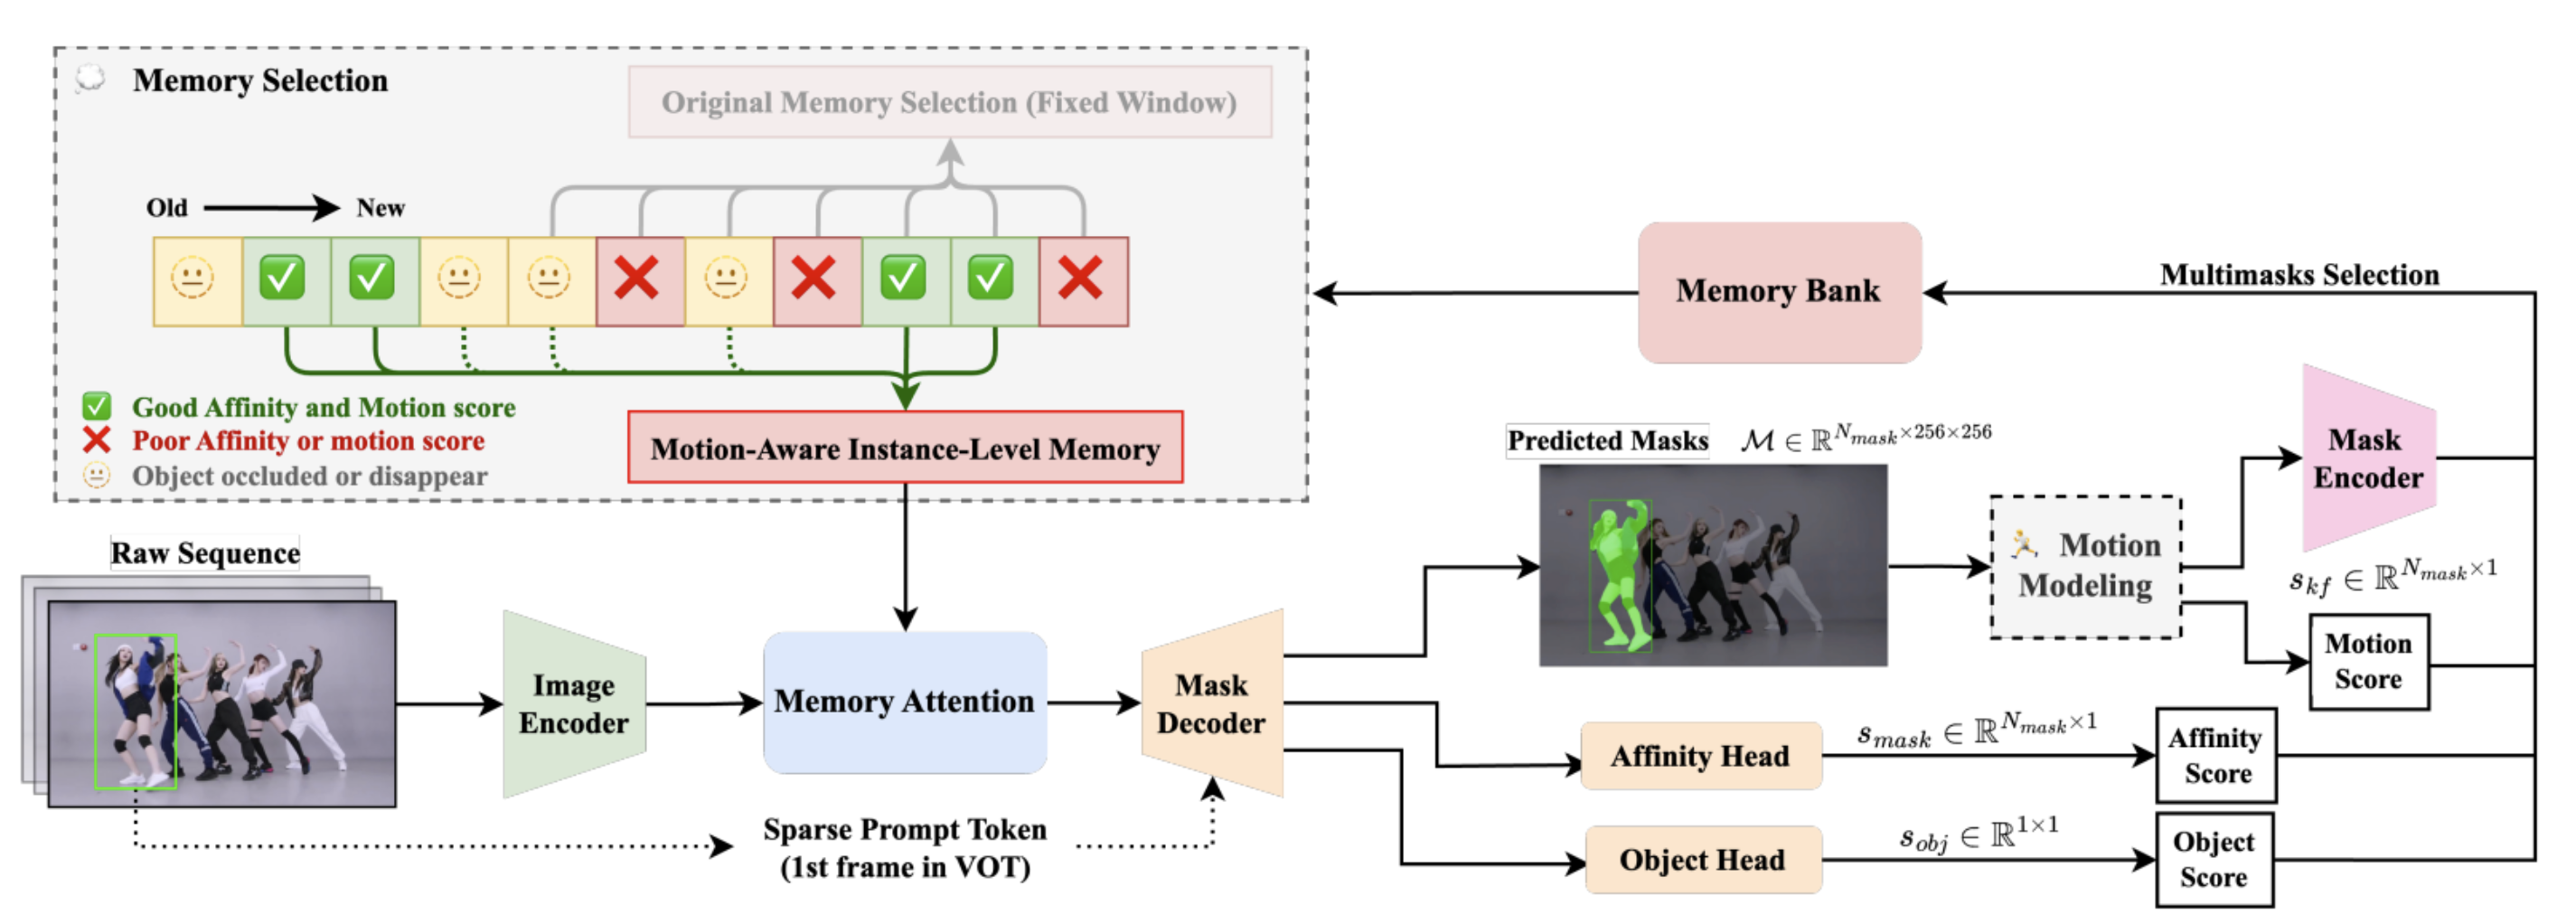
- SAMURAI 를 활용한 Zero-Shot Visual Tracking (Segment Anything model 2)
'AI > 아이펠_리서치' 카테고리의 다른 글
| [논문리뷰] Segment Anything (0) | 2025.02.18 |
|---|---|
| [논문리뷰] Masked Autoencoders Are Scalable Vision Learners (1) | 2025.02.14 |
| [논문리뷰] ComKD-CLIP: Comprehensive Knowledge Distillation for ContrastiveLanguage-Image Pre-traning Model (0) | 2025.02.11 |
| Airflow 디버깅 및 수정내용 (0) | 2025.01.14 |
| Transformer 를 사용한 seq2seq 모델 실습 (4) | 2024.11.27 |


